Team3S Logo, 5k jpg

New York - Munich - Portland - San Francisco - Seattle - Stockholm - Vancouver - Zurich
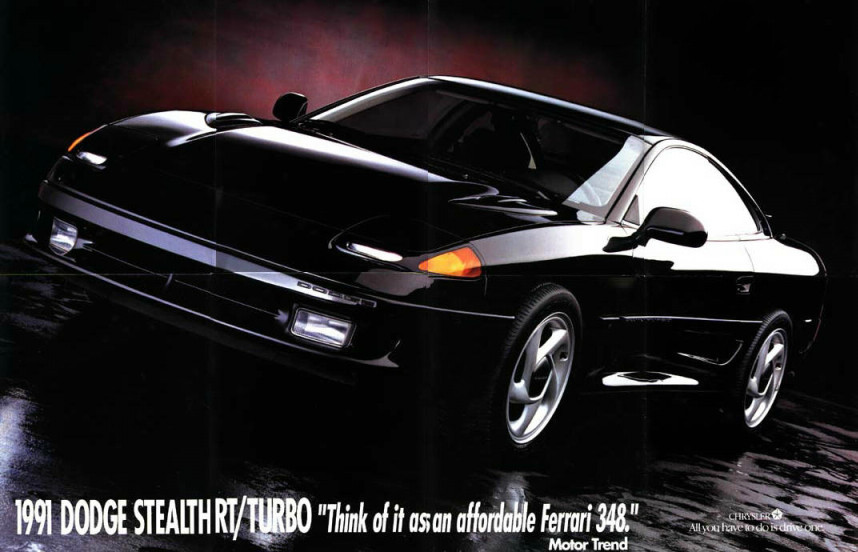


Stealth/3000GT 60K Service (DOHC)
A Do-It-Yourself Guide by Rich LeRoy


With thanks to Rommel Dizon and P.N. Sankarshanan
for their help and their munchies.
Special thanks go out to
Brad Bedell, Jake Decker, Jeff Wong and Bob Fontana
for letting me pick their brains.


Update:

Rich held another "60k DIY Clinic" last weekend, for those in need of the required 60k maintenance.  It took place 'up there' in the land of rain and more rain-- the Pacific Northwest. Darcy Gunnlaugson, Erik Gross, David Margrave and Glenn Amy showed up to help put bandages on skinned knuckles, hand Rich the tools, and then argue about it all at the local bars in the evenings.  Erik brought a camera and captured the festivities, and you can see the grisly evidence here:

www.Team3S.com/~egross/3000GT/60Kpictures/preview_page1.html


Red Gradient Line, 1k GIF


All Stealths and 3000GTs require service at 60,000 miles. So you've decided to save a few kopeks and do the service yourself... Good. Each of us should be able to service and maintain our vehicles, given the proper tools, time, and a guide to follow. Hopefully, this guide will help. Block out an entire Saturday to do the job as it'll probably take you 8 -10 hours.

First, collect the tools and the parts required. Probably the most important tool is your service manuals. Get them. Cherish them. These manuals will save you many times their initial cost and prove their worth for the life of your car. Don't skimp and buy an aftermarket manual, get the Mitsubishi or Dodge manuals (there are two books in a set).

For hand tools, a good set of 1/2" drive (10 mm up to 22mm) and 1/4" drive sockets are needed, as well as box and open end wrenches, needle nose pliers, a good set of screwdrivers, a couple of sizes of channel-lock pliers, a flashlight, a tire-marking crayon, four (4) 1-1/2" binder clips (just don't tell the boss what you need them for), and two *quality* torque wrenches. One of the torque wrenches (1/4" drive if possible) must register 7 ft-lbs within its range, and the other must have an upper range of at least 150 ft-lbs. Also, a floor jack and jackstands will be required. Breaker bars and universals for the socket sets are optional, as I found I just didn't need them, but perhaps you might.


You will also NEED two (2) tools from Mitsubishi. One of them is part number MD998752-01, the tensioner pulley socket wrench, and the other is part number MD990767-01, the end yoke holder. [The former is a special adapter that attaches to a torque wrench to properly tension the timing belt. The second is a redesign, and is practically useless - see below.]


Part Number Update:

We were told that the part numbers above are no longer valid, but we've left them here for reference. Member Jim Elferdink offered the following, directly from his receipt from Miller Tools:

MLR-MD998767 Wrench, timing belt $17.47 (this is the tensioner)

MLR-6958 Spanner wrench $57 (this is the end yoke holder)

Miller Special Tools Call to order: 1-800-801-5420

- : -

Please make note that there is an alternative for the tensioner tool - a similar tool is offered on the 3SXPerformance website for ~$20.

Timing Belt Tensioner Pulley Tool
3SXP Timing Belt Tensioner Pulley Tool


Let me add a few comments about these tools up front. Without a doubt, the tensioner pulley socket wrench is invaluable for setting the correct tension to the tensioner pulley. I am convinced this tool saved considerable time, as I took a few moments to ponder how I would have tensioned the pulley without it, and just don't see a good way to do it, period. The end yoke holder, in its reconfigured state (the -01 designation to the part number), is next to worthless, and the MORON at Mitsubishi who authorized and approved the redesign should be taken out and hung by his genitals. As shown in the manuals, (without the -01 designation) the end yoke holder is fine, and I know at least one person who has one and says it works fine. The new design is nothing more than a piece of flat bar steel with a circular notch in one end, surrounded by slotted bolt/stud holes. This is a piece of crap, but will work as I describe further in the directions, but certainly not like Mitsubishi hoped it would. (Okay, I'll quit ranting about this .... for now).

Now that we've covered the tools, let's take a look at the parts. The following list shows the parts I purchased and installed. I'll blatantly plug Tallahassee Mitsubishi as a great source for these parts, and I recommend them highly. The parts and service personnel are top notch and know their products.  


Parts List

Part Part Number
Timing Belt MD193874
Tensioner MD319040
Water Pump MD972005
Thermostat MD174234
Power Steering Belt MD172376
Accessory (A/C) Belt MD187463 (NO A/C)
MB879764 (W/ A/C)
Fuel Filter MB658136
Throttle Body Gasket MD180361
Intake Plenum Gasket MD143791
Spark Plug Wires MD193980


I have purposely left off spark plugs from this list. You can buy the NGK Platinums (get the correct heat range, depending on whether you have a TT or NA car), or you can get the copper replacement plugs from Napa or Pep Boys for much less money. The copper plugs are 30k plugs, but work just as well on the street and strip as the platinum 60k plugs, but for about 1/10th the price.

There are already VFAQ's for the fuel filter replacement, plugs & wires, and plenum removal, so I'll skip those parts and jump ahead to the biggies; timing belt, tensioner and water pump.

First, disconnect the battery (if it isn't already). As if you were changing the left front tire, break the lugs loose and jack up the driver's side of the car. (Make sure the rear wheels are blocked/chocked and the e-brake is on - safety first!) Put a jackstand under the car and let the weight of the car down on the stand. Remove the left front tire, and turn the steering wheel fully left. You will need all the room you can get under there. There are two plastic covers called undercovers in the manual. They are the black ones you see as you look in the driver's side wheel well. Take off the one that has the serrations in front of the tire, and the one the brake line pokes around, attached to it. These undercovers use a combination of bolts, screws and funky little fasteners that have a phillips screw in the center. With undercoating on them, these are a bugger to get off. I ended up gripping the heads of the screws with needlenose pliers, pulling them out, then gripping the plastic ring with channel locks and popping them off. Once these two covers are off, you will see your crankshaft pulley. Now the fun begins.

For TT owners, remove the driver's side IC air lines.

Now unbolt the four (4) 10mm nuts holding the cruise control box - the one with the cables attached to it. By wiggling it, the cruise box will come loose and can be set up by the hood hinge, out of the way. The manual says remove the assembly, but I found that it wasn't necessary - there is enough slack in the cables to just set it out of the way.

Remove the clamps holding the insulated A/C line on the driver's side, and swing the line over the engine and tie it off to the hood to keep it out of the way. Use a shoestring or a cable-tie. There is enough slack to do this, just go easy and don't pull hard on anything. You will appreciate the extra room this gives you later, trust me.

From underneath by the crankshaft pulley, loosen the tensioner for the alternator so that the belt is slack. From above, unbolt the alternator and let it rest against the back of the radiator. The manual calls for complete removal of this too, but again, I found it wasn't required. If you have a problem with not enough room later on, you can disconnect the wires and work the alternator out, but it's a bear.

From the front of the car, roll your floor jack under the oil pan and put a block of wood on it so you don't dent the pan. Making sure that nothing interferes with the crankshaft pulley, slowly raise the engine just to the point where the weight is taken off the driver's side motor mount. You can watch the cross-bolt in the mount as you jack the engine to see if you are lifting enough.

Now, loosen and remove the power steering belt tensioner. There isn't much room, so you will need to use open/box ends for this. Remove the power steering belt and the alternator belt.

Here is where you need some muscle. Using a *quality* 22mm socket (1/2" drive is a must!), place one of the studs of the new CRAPPY Mits tool into a stud hole in the crankshaft pulley and break it loose. I found that if you only use one stud on the tool, and brace the other end of the tool against the car frame, you can break the bolt loose. Of course, if you have the original tool that is pictured in the manual, you won't have a problem with this. This bolt is torqued to about 140 ft-lbs, so you need to really smack/kick/hammer the ratchet or breaker bar to get it loose. You almost need a second person here to hold the tool in place, but I did it alone, so it can be done. Again, if you happen to be so lucky as to have the original Mits crankshaft pulley tool, taking this bolt off is *much* easier. Bob Fontana told me he used an oil filter wrench on the pulley, but I can't imagine how he got a good grip on it (good going, Bob!). You will be taking this pulley on and off several times during this job to do several things, but the bolt need only be snugged by hand.

The manual calls for removing the brake fluid level sensor at this point, but my car didn't have one (at least not one that looked like what was in the manual). I skipped this part. Disconnect the two (2) position sensor connectors and just let them hang for the time being. Now, remove the two (2) upper timing belt covers. Pay attention as to where the long bolts came out, as they need to go back in the same places. There are different length bolts here, so you may want to mark them in some way. You *may* have to loosen the VIC motor from your plenum to allow the rear cover to lift off. It's a no-brainer to matchmark the position of the VIC motor, then loosen it enough to let the cover slip by.

Next, you need to remove the engine mount bracket. After removing the nuts, you may have to raise or lower the floor jack to get the bolt out of the bracket. Have a hammer ready so you can tap the bolt out.

This is a tough one. You need to remove the A/C idler from the motor mount. There is next to no room to work here (remember I said that the A/C line would give you more room?), so you need as shallow a socket as you have to get this idler off. The bolt is recessed into the idler, so a box/open end wrench won't help.

Now you need to remove the engine support bracket. These bolts *must* come off in a particular order, making sure to squirt some WD-40 onto the reamer bolt as it is being removed. Check the diagram in the manual for the proper order.  Snip the plastic tie-down for the position sensor cables from the lower timing cover. I messed with this thing for an hour before I figured out that there is no good way to save this little piece of plastic. You can use a regular tie-down cable when reassembling to hold it in place. Unbolt and remove the lower timing cover. Once again, there are several sizes of bolts, so pay attention to where the long ones go.

Now you have the timing belt, tensioner and water pump in plain view. Note the timing marks on the rocker cover and sprockets. Use the 22mm bolt and replace the crankshaft pulley. Don't bother tightening the bolt - finger tight is plenty. Using the Mits crankshaft tool, your hands or an oil filter wrench, turn the crankshaft pulley clockwise until the timing marks on the sprockets align with the corresponding marks on the rocker covers. Depending on where the engine stopped, you could be in for quite a few turns to get them to line up, but you NEED to do this. Your arms will hurt when you are done. Now, turn the pulley a little bit more in the clockwise direction, then turn it back to line up the timing marks again. This is to (hopefully) keep the sprockets from moving when you remove the belt. Go ahead and take the crankshaft pulley back off now.

Use the tire marking crayon to mark on the belt *exactly* where the timing marks are. You will have to count teeth and corresponding recesses in the belt to mark these on the belt. You should end up with four (4) marks on the belt. Make sure you mark both the edge of the belt and the top of the belt. Now, go back and double check by counting teeth that your marks are *exactly* correct. Now check a third time. If you mess this up, you'll be paying the dealer for a new top end. This is NOT where you can afford to be wrong! Now make a mark on the belt at the crankshaft sprocket that corresponds with the alignment mark there. Double check it. Triple check it. Now draw an arrow between each set of valve sprockets pointing towards the back of the car. This is the direction of travel of the belt. Now go back and check all your marks ONE MORE TIME.

Loosen the center bolt of the tensioner pulley to slacken the timing belt. The sprockets should NOT have moved, but if they did, it will only be slightly. Remove the two (2) bolts holding the tensioner. Some people will re-use their tensioner, but IMO, this is courting potential problems. Better to replace it. If you do re-use the tensioner, put it in a vise and s-l-o-w-l-y tighten the jaws, stopping frequently, to work the plunger back into the housing until you can slip a wire brad through the body holes to hold the plunger in place. Remove the timing belt. Set it aside, being careful not to smudge the marks you made.

If you are replacing the water pump, this is the time to do it. Some people will skip replacing this, but again, IMO you are courting expensive problems later. Better to replace it now. Removing the water pump isn't difficult, but be sure you are prepared. When the water pump is removed, you are going to lose about a quart or two of coolant, and it IS going to leak down all over. Remove the bolts from the face of the water pump, then unbolt the bracket from the top of the pump. It is now loose, but still held in place by the tube in the back of the pump. Wiggle the pump like a steering wheel with a gentle pulling motion until the pump is free. Hopefully, you had kitty litter spread out on the floor to catch the coolant. While the coolant is still dripping, go ahead and remove the old O-ring from the coolant tube that fits the back of the water pump and replace it with the new one that came with the water pump kit. I found that using the dripping coolant as a lubricant helped.

Water Pump Above

Water Pump Tube

Next, apply a very light coating of Perma-Gasket to both sides of the new water pump gasket and lay it on the new pump, aligning the holes. The Perma-Gasket material should keep the gasket stuck to the pump during the installation. Now, take the time to clean all the surfaces that got coolant on them with a clean, dry rag, and clean them well. This is important, as the timing belt will have its life drastically shortened if any grease, oil or coolant gets on it. After the area is completely cleaned, slip the new water pump over the tube and gently install it, using the same steering wheel motion you used to get the old one off. You do not want to upset the O-ring from its seat on the tube during installation of the pump. Bolt the new water pump on by hand, saving the top bracket for last. When all the bolts are hand tight and the pump snug, torque the bolts to the specs in the manual.

Go ahead and install the new tensioner and torque the bolts to 17 ft-lbs. DO NOT remove the pin holding the plunger. Leave it in place for now. You now need to transfer the marks you made on the old timing belt to the new belt (the belt is directional). You MUST be accurate when you do this. The belts are stiff enough that you can lay them edge-to-edge when you transfer the marks, if that makes it easier for you. Make sure to count the number of teeth between the marks on the old belt and then count the number of teeth on the new belt to make sure you transferred the marks correctly. Again, if you make a mistake doing this, it's going to be an expensive lesson.

Now, install the new belt over the sprockets, making sure that the marks on the belt correspond to the timing marks on the camshaft sprockets. Use the binder clips to hold the belt to the sprockets as you go. Be patient and go slow here. If one of the sprockets has turned slightly, you can use a box end wrench to turn it to the correct position. When I did this, the sprockets hadn't moved, but I had to pull bit on the second pair of sprockets because of the belt going under the water pump pulley. Finish threading the belt over the idler pulley, crankshaft sprocket and over the tensioner pulley. Make sure the mark you made corresponds to the crankshaft sprocket as well.  Now go back and double check all the marks. Now go back and triple check them. When they all line up, you're golden and more than half done.

Binder Clips

Crank Timing Mark

Using the Mitsubishi tensioner tool and the 1/4" drive, mate the pins in the tool to the holes in the tensioner pulley and torque it against the timing belt to 7.2 ft-lbs while torquing the pulley bolt to 42 ft-lbs with the 1/2" drive. This is a little tricky, but isn't as difficult as it sounds. Make sure that when you tighten the center bolt that the tensioner pulley is not rotated together. You can now remove the binder clips from the camshaft sprockets. Wiggle the pin holding the tensioner plunger. It should be relatively easy to move, indicating that the tension against it from the pulley is keeping the plunger depressed. Go ahead and remove the pin holding the tensioner plunger. You should be able to push the pin back in after removing it.

Tensioner Pin

Reinstall the crankshaft pulley again, and by hand, turn the crankshaft pulley two (2) turns clockwise (this is not easy), then turn it back two (2) turns to realign the timing marks. Take a break, have a cup of coffee, and let the belt sit for a few minutes. Check to make sure that the timing marks on all sprockets still align and the tensioner pin can still be reinserted. If the pin cannot be reinserted, check the amount of protrusion of the plunger. The correct range is 0.149" to 0.177" (3.8mm to 4.5mm). If the protrusion is out of spec, you will need to loosen and retorque the tensioner pulley after removing and recompressing the tensioner in a vise. Not a fun part of the job. Go ahead and take off the crankshaft pulley again.

Before installing the lower timing cover, you need to prepare the cable tie for the sensor wires.  You can use a plastic cable tie to hold the position sensor wires using the same hole. Thread the cable tie from the back side of the cover, loop it over the wires, then back through the hole and into the ratchet part of the tie. Leave it loose for now, and thread the tail end back out the hole. Install the lower cover, making sure to keep track of the right size bolts. Remember I said to keep track of them? With the bolts finger tight, use a pair of pliers to pull the tail end of the cable tie that is hanging out of the cover hole until the tie is ratcheted tight. Snip off the excess. Torque the lower timing cover bolts to 7-9 ft-lbs.

Reinstall the engine support bracket, making sure to use the numbered sequence shown in the manual. Use some WD-40 on the the reamer bolt as you install it. Torque these bolts to proper amount as shown in the manual. Now install the engine mount bracket and torque the nuts as shown in the manual. You will probably need to tap the bolt to get it through the center after torquing it to the support bracket. Let the floor jack down and pull it out from under the car.

Install the A/C idler pulley and torque the bolt to 36 ft-lbs. There is almost no room to work here, and I found that I couldn't actually get my torque wrench on the bolt, so I had to play it by ear when tightening. Be safe and use a torque wrench.

AC Belt Tension

Reinstall the upper timing belt covers and torque the bolts to 7-9 ft-lbs. Realign the VIC motor on the plenum to the matchmarks you made and tighten it back down. The manual doesn't have a torque spec for these allen heads. Reinstall the brake fluid level sensor if you took it off.

Now install the crankshaft pulley and torque the bolt to 130-137 ft-lbs. Depending on which model of the Mitsubishi tool you are using, this can be easy or a real pain in the butt. If you have the original tool, you can do this by yourself. If you have the new, "improved" and stupid version of the tool, you will need a helper to hold the tool in place until the back end of the tool swings up enough to be held against the car frame while you torque the bolt. Remember, you can only use one stud in this wonder-tool. The inner edge of the circular cutout of the tool will be against the socket you are using to torque the bolt. A truly stupid piece of engineering in my personal and professional (engineering) opinion. Hey Mitsubishi, are you LISTENING HERE????? Okay, rant mode off...

Install the power steering belt and tensioner assembly and torque the bolts to 31 ft-lbs. Install the alternator, then install the A/C belt and tension it using the adjuster by the crankshaft pulley. This belt needs to be tight, otherwise it will squeal when the A/C is turned on.

Untie and reclamp the insulated A/C line in place. Install the cruise control box back into place and torque the nuts. Install the IC air lines and tighten the clamps to 2.9 ft-lbs.

Top up the coolant as much as you can. You'll need to add more later, but for now, fill the reservoir.

Reconnect the battery. Look around and make sure there are no tools, rags or spare nuts/bolts laying on or around the engine. Okay folks, here's the acid test. Start the car. If you did everything correctly, then it should be purring. Let it idle for a few minutes, then turn on the A/C. Do you hear that sqealing? That's the belt that needs to be tightened. It seems that this belt needs to be tightened more than some folks are comfortable doing, but go ahead and shut the car off and tighten the adjuster some more. You may have to repeat this a couple times.

With the engine warm, you should be able to add more coolant to the system until the reservoir shows a correct level. Remember to use a coolant mix (depending on region) and not just straight water or Prestone.

Reinstall the undercovers, then the tire. Now sit down and pat yourself on the back, `cuz you're done. You're also tired, dirty, missing some skin on a couple of knuckles, and you ache in places you didn't know you had, but the car is ready for another 60,000 miles of fun! And with the $500+ you just saved by doing it yourself, a road trip to my house to buy me dinner as a little bit of a "thank you" might be in order ..... :-)


NOTE:  It has been pointed out that while you're doing this required service, you should also replace the timing belt idler pulley. If the pulley bearing seizes up, it won't turn, and it will quickly and completely grind the timing belt smooth. Such a condition will trash your engine in short order. Opinions vary about whether or not replacing the timing belt idler pulley is a 'must' for the 60k service, but it's pretty much a definite for the second time you go through it at 120k...


Red Gradient Line, 1k GIF

Red Gradient Line, 1k GIF


Addendum 1: Cost of 60k Maintenance

Cost Estimate by Jack Tertadian


Parts Cost:

Timing Belt
$145.55
AC Belt
$ 27.70
Power Steering Belt
$ 14.20
Water Pump
$ 98.17
Timing Belt Tensioner
$ 27.27
Idler Pulley
$ 26.20
Fuel Filter
$ 00.00
Throttle Body Gasket
$ 00.00
Intake Plenum Gasket
$ 00.00
-
-
Subtotal
$339.09


Less my 25% discount - (it's good to be the king!) :-) = $254.32 + tax


Total Parts and Labor Cost:

{ Parts and Labor Scenario #1 }
Dealership Labor cost: 5.5 hours @ $68/hour = $374
Total: $628.32

{ Parts and Labor Scenario #2 }
Mitsu tech working "On the Side" will do labor = $225
Total: $479.32

(plus tax on the parts)


This does NOT include spark plugs/wires etc, as my friend had new plugs/wires changed already.
--- Jack Tertadian


Red Gradient Line, 1k GIF

Red Gradient Line, 1k GIF


Addendum 2: Crankshaft Pulley Removal Tool

Alternative Suggestion and Photo by Anthony Melillo


After recently doing the timing belt service on my car, I can offer you some suggestions on removing the crankshaft pulley that should make it a lot easier for you.

Firstly, forget about those expensive tools.  I went through the same nonsense that many people have..., where places wanted to charge me a lot of money, Miller Tools among them.  They wanted about $60 for the tool.  I happened to borrow a custom-made tool from a fellow Team3S member, and it only cost me a few bucks with shipping.  His name is Marc Jonathan Jacobs  { Marc adds:  "...Please mention that the tool is free for Team3S members to borrow, for the cost of shipping to/from!  (It is the least I can do compared to what the Team3S list has done for me! }.

I decided to make my own tool just in case I needed it in the future.  It cost me about $7 for a piece of metal and a few bolts.  Here's a photo:

Harmonic Balancer Tool Side View
{ Click to enlarge photo. }


The crank pulley should just pull right off.  I was told to use a harmonic balancer puller, and when I got it out, there was nowhere to attach it.  SO..., I just gave the pulley a pull and it came right off.

Feel free to contact me if I can be of further help.  Good Luck!


--- Anthony Melillo
1997 VR-4, Firestorm Red
http://home.sprintmail.com/~anthonymelillo/3000gt.htm


Red Gradient Line, 1k GIF


Questions about your car???
Ask the other owners--
On our FREE mailing list!
Click HERE

Red Gradient Line, 1k GIF


3D & Ram Logo anim, 6k GIF


Team3S FAQ Page


Team3S HOME


Article & How-to Images © 1995-2004 Rich Leroy, All Rights Reserved.
Other images © 1995-2004 Bob Forrest, All Rights Reserved.